Most people who want to start trading crypto do the same thing. They watch a few YouTube videos, pick a platform the influencer recommends, and try to sign up. Everything seems straightforward until they hit a wall they didn’t see coming.
That was me.
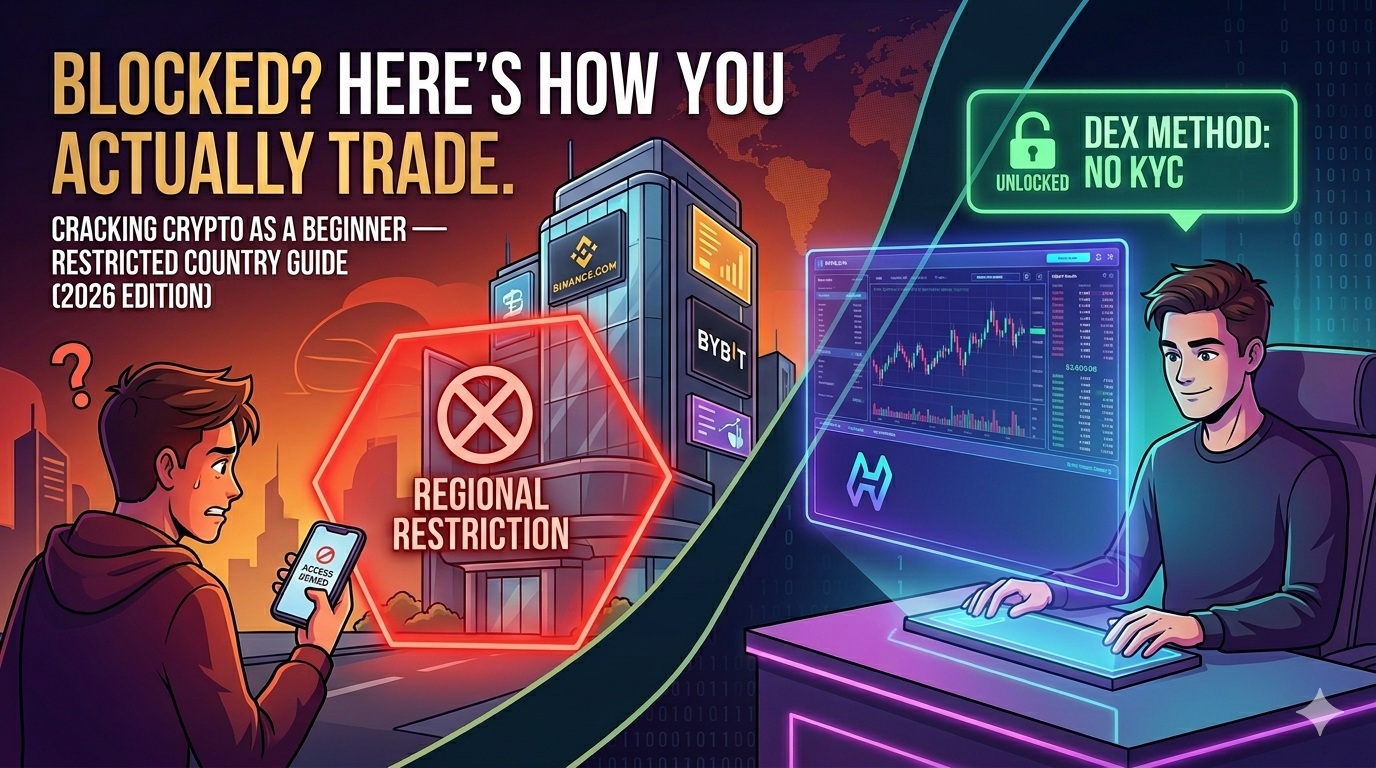
I’m based in Singapore, and when I first started looking into crypto trading, every creator I followed — without exception — was using Binance or Bybit. Tutorials, strategy videos, platform walkthroughs, all of it. So naturally, I went to sign up. And that’s when I found out Singapore is on the restricted list. No Binance.com. No Bybit. The global versions that everyone on YouTube was using weren’t available to me.
Nobody mentioned this. Not once.
It was genuinely confusing and frustrating — and I’ve since found out I’m not alone. Americans run into the exact same wall. Binance.com is blocked in the US too, which surprises a lot of people given how often it gets recommended online. Canadian and UK traders face their own version of the problem with derivatives restrictions. The frustration is universal even if the specific restrictions differ.
So before anything else — before charts, before strategies, before you put a single dollar into anything — let’s sort this out. This guide covers how to start trading crypto as a complete beginner: how to choose a crypto exchange, get verified, and make your first trade, whether you’re in a restricted country like Singapore or the US, or whether you have full access to global platforms like Binance and Bybit.
Getting this wrong wastes your time and, depending on what you do, potentially your money too.
Step 1: Figure Out Which “Zone” You’re In
Crypto exchanges operate under different rules depending on where you live. Governments regulate financial platforms, and exchanges enforce those rules by restricting access based on your country of residence. For simplicity, think of the world as two zones.
The Green Zone — Full Access Countries
If you live in one of these regions, you can sign up for the major global exchanges without much hassle:
- European Union (Germany, France, Portugal, Spain, etc.) — covered under MiCA, the EU’s crypto regulatory framework
- UAE (Dubai / Abu Dhabi) — one of the most crypto-friendly jurisdictions in the world right now
- Switzerland — home to “Crypto Valley” and well-established infrastructure for digital assets
- Australia and Japan — regulated but fully accessible, with strong local exchange options
Green Zone users get access to global liquidity (the total pool of money flowing through international markets — more buyers and sellers means better prices and faster trades), easy bank transfers in and out, and the full suite of trading features on every major platform.
The Red Zone — Restricted Countries
If you live here, the major global exchanges will either block you outright or severely limit what you can do:
- Singapore — where I am. Restricted from the global versions of Binance and Bybit. Must use MAS-licensed local platforms or decentralised alternatives instead.
- United States — Binance.com and Bybit’s global platform are not available. US traders are limited to Coinbase and Binance.US, which have a smaller coin selection and fewer features.
- Canada and UK — often restricted from derivatives trading (leverage) and certain tokens, even if basic spot trading is available
- Mainland China — effectively blocked from all major international platforms
- Sanctioned countries — North Korea, Iran, Cuba, Syria, and Russian-controlled territories in Ukraine are blocked entirely
If you’re in the Red Zone — welcome to the club. There is a legitimate path forward. It just takes a few more steps than the YouTube tutorials show you, and this guide will walk you through all of them.
Step 2 (Green Zone): How to Sign Up on a Major Crypto Exchange
If you’re in the Green Zone, here’s how to get started from scratch.
Best Crypto Exchanges for Beginners in 2026
There’s no single right answer, but here’s a simple breakdown:
- Binance — the biggest crypto exchange in the world by volume. Best selection of coins, lowest fees, and the platform you’ll see most often in trading tutorials. A solid default choice for most beginners in the Green Zone.
- Bybit — popular with more active traders. Cleaner interface for charting and faster execution. You will see this with many Youtube crypto influencers.
- Coinbase / Kraken — slightly higher fees, but arguably the most beginner-friendly and trusted platforms, especially for those who want simplicity and peace of mind over their first few months.
For your very first account, Binance, Bybit or Coinbase are the most common starting points.
How to Sign Up and Start Trading
1. Create your account
Go to the exchange’s official website — always double-check the URL. Phishing sites that look identical to the real thing are extremely common in crypto. Sign up with your email, set a strong unique password, and enable two-factor authentication (2FA) immediately. Don’t skip 2FA. It’s the single most important security step you can take and takes about two minutes to set up.
2. Complete KYC — What It Is and What to Expect
KYC stands for “Know Your Customer.” In crypto, this means the exchange verifying that you’re a real person and not on any government watchlist. It’s a legal requirement that every regulated exchange has to follow. You’ll be asked to:
- Upload a photo of your Passport or National ID
- Complete a short selfie or live video to confirm you’re a real person
Most platforms in 2026 process KYC using AI, so approval is usually instant or within a few hours. There’s no getting around it — no KYC means no deposits, no withdrawals, and no trading. It sounds more invasive than it actually is.
3. Make your first deposit
Once verified, you can add money to your account. Your main options are:
- Bank transfer — SEPA (Europe), Faster Payments (UK), ACH (US). Usually free or very low fee, but takes 1–3 business days.
- Credit/Debit card — instant, but comes with a higher fee (typically 1.5–3.5%). Fine for a small first deposit, but not ideal for regular top-ups.
Most beginners start by buying USDT or USDC — these are called stablecoins, meaning their value is pegged 1:1 to the US Dollar. Think of them as digital dollars that you then use to buy other crypto. The advantage is that when you’re not in a trade, you can sit in USDT or USDC without worrying about price swings.
4. Make your first trade
Navigate to the Spot market to buy and sell coins. This is the simplest way to trade — you buy a coin with your USDT, hold it, and sell it back when you want to exit. Straightforward.
You’ll also see a Derivatives or Futures section. This is where leverage trading happens — where you can control a larger position than your actual deposit. I’ll be straight with you: leverage was one of the first things I lost money on. It feels like a cheat code until it isn’t. If you’re brand new, stay out of this section until you properly understand how the Spot market works. There’s no rush.
Step 3 (Red Zone): How to Trade Crypto in Restricted Countries
If you’ve searched “Binance not available in my country” or hit a wall trying to sign up — this section is for you. If you’re in the Red Zone — the US, Singapore, Canada, or elsewhere — you can’t simply sign up for a global exchange. You’ll hit a wall during KYC because your country is on their restricted list. That’s the wall I hit when I tried to sign up for Binance.
The solution is to go decentralised. This means using a platform that doesn’t require any identity verification at all, because there’s no central company behind it to enforce one.
But first, a word on a “shortcut” that often gets mentioned in crypto communities.
Can You Use a Palau ID to Bypass Crypto KYC? (Read This First)
You may have come across advice online suggesting you use a Palau Digital Residency ID to bypass KYC on global exchanges. Palau is a small island nation in the Pacific that offers a digital residency programme, and because it isn’t on any restriction lists, some traders tried using its ID to register on platforms that would otherwise block them.
Honest answer in 2026: most major exchanges have stopped accepting it. Binance and Bybit have significantly tightened their document verification systems. Beyond that, using a foreign ID to misrepresent your country of residence to a financial platform violates their terms of service and could create legal issues depending on your jurisdiction.
Don’t waste your time on this route. The DEX method below is the legitimate, reliable path forward.
What Is a DEX (Decentralised Exchange) and How Does It Work?
A DEX, or Decentralised Exchange, is a trading platform that runs directly on a blockchain. There’s no company operating it, no account to sign up for, and no KYC process. You connect a crypto wallet and trade directly from it. The trade-off is that the initial setup is slightly more technical than a regular exchange — but once it’s done, the experience is surprisingly smooth and genuinely professional.
Best Binance Alternatives for Restricted Country Traders
If you’re looking for Binance alternatives that work regardless of your country, these are the two worth knowing:
- Hyperliquid — currently the leading DEX for active trading. Offers professional charting, perpetual contracts (the crypto equivalent of futures trading), and an overall experience that rivals centralised exchanges. No KYC required. This is the main platform I’d point restricted-country traders to.
- Uniswap / Jupiter — better for simply swapping one coin for another (spot buying and holding). Not built for active leverage trading.
How to Buy Crypto Without Binance — The DEX Setup, Step by Step
1. Get a crypto wallet for beginners
Download Rabby Wallet or MetaMask. This is your bank account in the decentralised world — it holds your funds and acts as your login to any DEX platform. Installing either is straightforward and takes about five minutes.
When you set it up, you’ll be given a seed phrase: 12–24 random words generated specifically for your wallet. Write these down on paper and store them somewhere physically safe. Treat your seed phrase like cash. Anyone who has it has complete access to your funds — and unlike a bank, there is no customer support to call if it gets compromised. Never store it digitally. Never screenshot it. Never share it with anyone for any reason.
2. Set up a VPN
Some DEX interfaces may be geo-restricted in your country. A VPN masks your location by routing your internet connection through a server in another country. Set it to a neutral country like Switzerland. Paid services like NordVPN or ExpressVPN are more reliable than free options for this purpose.
3. Fund your wallet — the crypto on-ramp explained
This is the trickiest part: getting real money from your bank into your wallet. Here’s the most reliable approach:
- Sign up for a local, licensed exchange in your country. US users can use Coinbase; UK users can use Kraken; Singaporeans can use Coinbase or Crypto.com.
- Complete KYC on that local platform — this is perfectly fine because it’s a platform authorised to operate in your country.
- Buy USDC (a stablecoin pegged 1:1 to the US Dollar) on that local platform.
- Send that USDC from the local exchange to your Rabby or MetaMask wallet address.
This bridge between your regular bank money and the crypto world is called your “on-ramp.” It feels like a lot of steps the first time. By the second time, it takes about five minutes.
4. Connect your wallet and start trading
Go to Hyperliquid, click “Connect Wallet,” and approve the connection from your MetaMask or Rabby. Deposit your USDC into the platform and you’re ready to trade — no account, no KYC, no country restrictions.
Once you’re set up on the right platform, the next step is knowing how to actually conduct yourself as a trader — but that’s a whole separate topic worth its own guide. For now, here’s a quick summary of where to start based on where you are.
Quick Reference: Which Platform Is Right for You?
| Your Situation | Recommended Platform |
|---|---|
| EU / Switzerland / UAE / Australia | Binance, Bybit, or Kraken |
| United States | Coinbase or Binance.US + Hyperliquid (DEX) for active trading |
| Singapore | Coinbase or Crypto.com + Hyperliquid (DEX) for active trading |
| Canada / UK | Check local derivatives restrictions; Kraken for spot, Hyperliquid (DEX) for more flexibility |
| Any restricted country — active trading | Hyperliquid (DEX) |
| Any restricted country — buying and holding only | Uniswap or Jupiter (DEX) |
Frequently Asked Questions
Can Americans use Binance? Not Binance.com. US residents are restricted to Binance.US, which has a significantly smaller coin selection and fewer features than the global platform. Many US traders use Coinbase for regulated trading and Hyperliquid as a DEX alternative.
Can I trade crypto in Singapore? If you’re wondering how to buy crypto in Singapore specifically, the short answer is: use a MAS-licensed platform like Coinbase or Crypto.com for your on-ramp, then move funds to Hyperliquid if you want to trade actively. The global versions of Binance and Bybit are not available to Singaporean residents.
What is the difference between Spot and Futures trading in crypto? Spot trading means you buy an asset and own it outright — straightforward buying and selling. Futures (or derivatives) trading means you’re trading contracts that track an asset’s price, often with leverage. Spot is where every beginner should start. Futures carries significantly higher risk.
Do I need a lot of money to start trading crypto? No. Most exchanges let you start with as little as $10–20. Starting small is actually a good idea — it lets you learn how the platform works without meaningful risk while you find your feet.
What happens if I lose my seed phrase? Your funds are permanently inaccessible. There is no account recovery, no customer support, and no way in. This is why storing it safely matters more than almost anything else in the DEX setup process.
Is crypto trading legal in my country? For most countries, yes — but the regulations around which platforms you can use, how gains are taxed, and which products (like leveraged derivatives) are permitted vary significantly. Always check the specific rules for your jurisdiction before you start.
What is a stablecoin? A stablecoin is a type of cryptocurrency whose value is pegged to a traditional currency — usually the US Dollar. USDT and USDC are both pegged 1:1 to the dollar, meaning 1 USDT ≈ $1 USD. They’re used as a “safe harbour” in crypto — a way to hold value without exposure to price swings when you’re not in an active trade.
None of this needs to be figured out all at once. Set up your account, make a small first trade, and get comfortable with how things actually move before you risk anything meaningful.
The frustration I felt when I first realised I couldn’t access the platforms everyone was talking about — that’s real, and it’s more common than people admit. But there are legitimate paths in regardless of where you’re from. It just takes a bit more setup than the YouTube tutorials let on.
That’s really all getting started is. The rest you learn by doing.
Pingback: Best Crypto Wallets for Traders (2026): Phantom, MetaMask, Rabby